Saturday 30 May 2015

Sunshine and picnic

When it is really really sunny, it is much too hot on our terrace in the afternoon even with an umbrella. In this case we like to take a blanket and move with our afternoon snack, some drinks and books into the half shadow provided by some big trees growing on the edge of our garden. To be even more comfortable (and to protect my good sofa cushions) I made some simple pillow cases and stuffed them with old pillows.
Our garden-blanket is very colorful and I choose matching unicolored fabrics for the pillows. 
I made the blanket already two years ago and I still love the happy colors. It is not patchworked the print is like that. I just added a heavy batting and a dark blue back and stepped some straight lines to hold it together. 
We love to have picnic in the garden (and elsewhere)! Isn't it looking like a relaxing afternoon? 
I hope you can enjoy sunshine and shadow this weekend too.

Bonne weekend et à bientôt,
Jane

Friday 29 May 2015

Hoody #1

Who said that it is only girls that are driving their moms crazy because they are having their own mind about what they want to wear and that already in very young ages? I couldn't add a word to the choice of my eldest about how his hoody had to be. In one word "black"! Except the hood that was allowed to have green stars and he agreed also to a green striped lining for the hood. But "no-no-no" to other green elements like a front pocket.
It didn't turned out as boring as it might sound

I disobeyed and changed the cuffs on the sleeves and made them with stars too, half expecting I had to rip them of and add black ones :-)
The black part of this pullover is a recycled sweater and I kept the hem. Unfortunately I cut not precise enough and the backside is slightly longer. To make it less visible I left a slid on the side. Looks like I wanted it this way.
The pattern is shirt-Leo from Pattydoo, with which I already made the t-shirt for my other son. It is a very flexible pattern.

A bientôt,
Jane

Tuesday 26 May 2015

File folder cover

This is the cover I made while taking notes to explain how to determine the pieces for it (post yesterday). 
Additionally to what I described yesterday I added a pocket and a lable holder to the front. For the lable I just fixed two vertical straps and you can slide in a piece of cardstock to lable the folder.
For example paper I put in some drawings of my son, but the folder is meant to be for my grandma.

You want to know some more details about how to assembly all the pieces? No problem, I took some photos:
First, be sure you have all the pieces and that all the extras are fixed.
Now you have to concentrate to put everything together in the right order. Therefor I put the cover with the nice side up in the middle and lay the flaps with the nice side up beside the edges where they will go. This means the left flap (left when the folder is open) is lying on the right side of the top. Imagine that the right side of the cover is what you see when the folder is closed and when you open it, you see the left flap, which is in my case red with a pocket. This leaves the right flap to the other side.
Then I turn the flaps onto the cover. The right or nice sides are facing each other!
The lining is covering the whole. Fix everything with needles and sew once around, leaving an opening for turning on the bottom. Take care that the layers are not sliding out of their place. 
Cut back the corners and turn the cover. 
Iron and close the opening.
It should fit now to your well measured file-folder!

A bientôt,
Jane

Monday 25 May 2015

Tutorial: Measurements for a file-folder cover

When giving sewing classes in the evenings, it is quite good, when the students have already their fabrics pieces pre-cut. I found out that it takes a lot of time until everybody had cut out all the pieces and is ready to sew. Then when you are coming to the tricky parts of the project it is maybe already 10pm and the most persons are tired by then and their capacity to absorb a new technic is limited. 
Means on the other hand, that I have to give very clear instructions to my students what to cut and prepare in advance. So it is homework for me and them. 

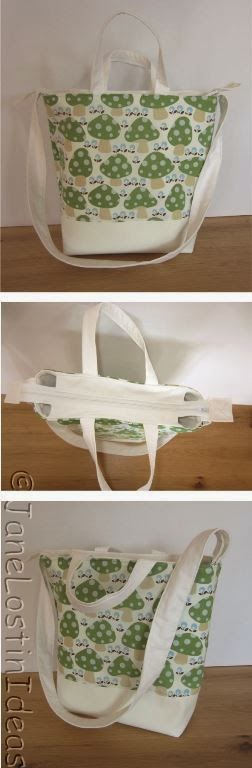
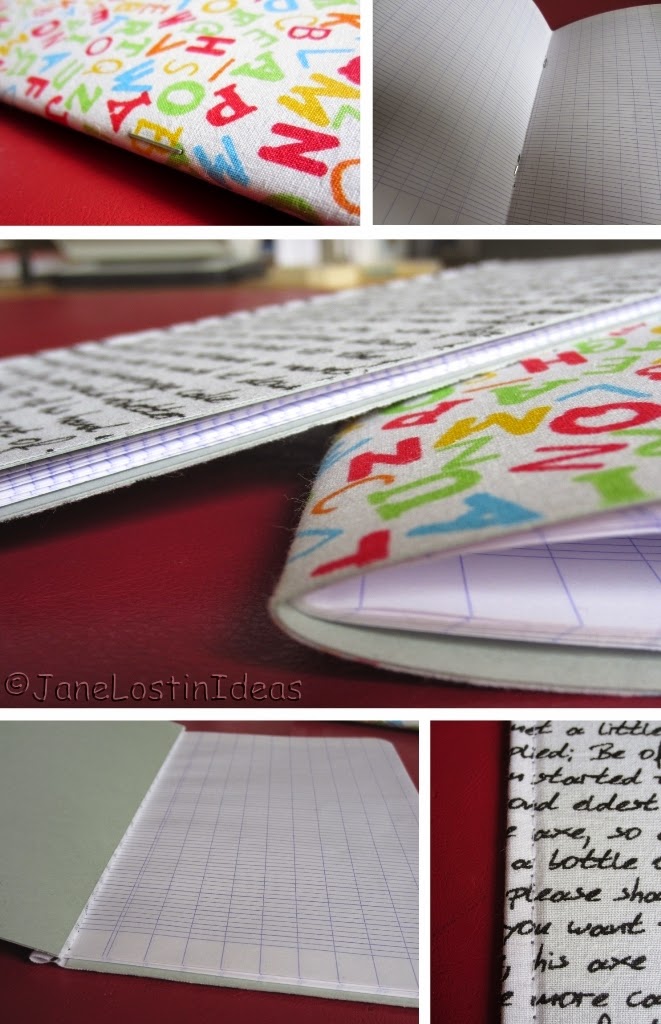
Lately I made a detailed description about how to take measurements for sewing a cover for a file folder. You remember I made quite often covers for writing cases (have a look here) which is working with the same method. As I had to make the description for the sewing class in french (and one of my students have been so kind to correct the grammatical errors) I will give here for the first time instructions in two languages.  

You have to know that every folder is different, even when they are marked to have the same format, folders from different producers are often slightly different in height or width. So your first step is always to measure the folder (or book or whatever you want to make the cover for)!
Measure the height and the length of the folder when it is closed. The length is shorter when the folder is open and lying flat. Measure carefully and in case it is not a straight value, round it up to the next 0,5cm. In my example I measured 62,3cm but used 62,5cm in the following.
Attention les tailles change légèrement par producteur, mesurez votre classeur ou livre bien
Mesurez la largeur du classeur (ici 32 cm) et la longueur devant-côté-derrière quand le classeur est fermé (important  car si le classeur est ouvert,  la longueur est plus courte et votre housse sera trop petite). La longueur ici est de 62,5 cm. Arrondir au 0,5 cm supérieur – c’est mieux de découper trop grand que trop petit!
Then you have to think about which extras you want to add to your cover, like pockets or pen holders or a closure. Have a careful look how much space there is. It is always a good idea to make a little drawing to not forget anything.
Ouvrez votre classeur et réfléchissez si vous avez besoin de quelques extras à l’intérieur comme des poches ou des places pour stylos et mesurez la place que vous avez...
C’est toujours bien d’avoir un petit dessin pour ne rien oublier.
In any case you will need a flap on both sides to hold the cover onto the folder. In my case there are two slits in the folder cover that should stay open, so I am limited for the width of the left flap.
For putting the folder in it's cover, you have to bend it a little over the point where it is lying flat. To not damage the folder by bending it too hard, I made the right flap smaller. And as this side is normally covered with papers I won't add anything to that flap.
To the right flap I want to add a pocket for letters and envellopes and two places to store pencils.
Pour faire tenir la housse, vous avez besoin d’un rabat à gauche et à droite.
Mon classeur a des trous (fentes) sur la face de devant que je ne dois pas recouvrir. C’est pour cette raison que je suis limitée pour le rabat gauche.
Pour enfiler le casseur dans sa housse, il faut le plier un peu dans la faut direction. Pour limiter cette pliure, le rabat à droite sera plus petit. 
Pour ce modèle, je prévois une poche pour des enveloppes ou du courrier et deux fixations pour stylos sur le rabat de gauche.

In any case you will need a flap on both sides to hold the cover onto the folder. In my case there are two slits in the folder cover that should stay open, so I am limited for the width of the left flap.
For putting the folder in it's cover, you have to bend it a little over the point where it is lying flat. To not damage the folder by bending it too hard, I made the right flap smaller. And as this side is normally covered with papers I won't add anything to that flap.
To the right flap I want to add a pocket for letters and envelopes and two places to store pencils.
Normalement je fais les coutures à 0.75 cm de distance du bord du tissu. Je vais faire pareil ici. Pour que la housse passe bien, j’ajoute 0.25 cm. Ça veut dire que j’ajoute à la largeur du classeur, 1 cm en haut et 1 cm en bas. Soit pour ce modèle taille de la largeur 32 cm + 1 cm en haut + 1 cm en bas = 34 cm. Je faire pareille pour la longueur et ajoute 1cm à droite et 1cm a gauche.
Pour les poches, il suffit d’ajouter 2 x 0.75 cm comme d’habitude.

This is giving the following sizes for my pieces:
Outside (visible when the folder is closed): 34cm x 64,5cm
Lining (not at all visible): 34cm x 64,5cm
Left flap: 34cm x 44cm (44cm = 21cm +1cm seam allowance x 2 because it will be folded to lay double)
Right flap: 34cm x 32cm (44cm = 21cm +1cm seam allowance x 2 because it will be folded to lay double)
Pocket: 2 times 15,5cm x 16,5cm
A little bit of elastic strap for the pencil holders

Découpages:
Extérieur (visible quand le classeur est fermé) : 34cm x 64,5cm
Doublure (pas du tout visible) : 34cm x 64,5cm
Rabat gauche : 34cm x 44cm (44cm = 21cm+1cm fois 2 parce-que on plie en double)
Rabat droit : 34cm x 32cm (32cm = 15cm+1cm fois 2 parce-que on plie en double)
Poche : 2 fois 15,5cm x 16,5cm
Pour la fixation stylo un peu d’élastique

This is more or less what you need. There are no bounds to your imagination for how to decorate the outside or what to add to the flaps. I often piece the outside in patchwork style or I add applications. Do the composition for the outside first and then cut it to the right size.
You can add a closure too. Have a look to different possibilities in my previous examples
In my next blog post (tomorrow) I will show you how my example turned out and how I put it together.
Vous pouvez décorer votre extérieur avec des applications ou vous le composez de plusieurs tissus différents. Faire ces compositions avant et découper à la taille mentionnée.
Vous pouvez ajouter une fermeture au classeur. Voyez quelques exemples dans mon blog ici.
Demain, je vais vous montrer mon housse exemple et comment je fait la couture.

A demain,
Jane

Thursday 21 May 2015

Sewing clothes

In the moment I love sewing clothes. You've seen my dress collection lately and now I am into T-Shirts and shorts. It is fun and I learned a lot of new things. 

First, I want to show you the fourth dress. It is for my baby niece and I hope it is usable. I don't think dresses for babys that can't walk jet are any usefull and normally they are not even looking good, because they are always in a huddle around the belly. Therefor I made a top that should reach to the belly and it stays hopefully fix in place. Underneath I fixed a little fluffy fabric. The top is made with the freebook Trotzkopf from Schnabelina and I added the skirt a bit freestyle.
For the colar I tried a new technic that I found here for making hems without open seams. This is a great technic and it worked directly the first time I tried.

Sewing for babys is fun and less risky, because if it doesn't work, I havn't wasted so much fabric. But I also want to sew things that are for my family and I started with a T-Shirt for my youngest. It has been him choosing the fabric combination and where each fabric should go.
It worked so well I couldn't wait to put it on and take the first picture. I used this e-book from pattydoo and I am very happy with it. There are lots of possible variations with the pattern (long sleeve, short sleeve, hoody, different hems) and there is a very detailled video to explain the different steps. Great for beginners and on top the pattern didn't cost much! Definitely this is not the last pattern I bought at pattydoo.
Like I already mentioned some times, my normal sewing machine can't sew elastic seams, so I evoid sewing jersey with it. In this case I cheated for the hem and took the stars fabric double. Collar and arm hems are fixed with the overlock. 
The black middle part of the shirt is a recycled shirt of mine.

I wanted immediately start a T-shirt for my elder son too, but his fabric whishes are not in my drawers. Instead I made some pyjama-shorts for him, recycling an old mens cotton pyjama trousers.

As it has been a big cotton pyjama, I even had enough to make a baby summer trousers with this free-book. It will go to the babyboy of friends in germany and I have to wait for feedback on the fit. 
To make the fabric a little more interesting for kids I applicated some colorful fishes. The bubbles are painted with fabric paint. 
When making a clothes present I like to give a complete outfit, so I sewed a T-Shirt, but I think the different shades of blue and turquoise are not very nice together. I will have to think of something else.
The collar is with the new method I have learned, but for the hem I took the risk with my sewing machine. I put the foot pressure nearly to zero and used a slight zig-zag stitch. The problem when taking of the foot pressure is that the transport is not always regular. But in this case it worked okay and I am quite happy with the result.
This is it for now, but there will be more clothes to follow.

A bientôt,
Jane

Tuesday 19 May 2015

Bags with zipper

Lately everybody want to have bags closed by a zipper! (I should never have shown that I can do those too). So beside my new enthusiasm for cloth' sewing I had to make 4 customer bags.
One is a boring copy of this one, only with a zipper instead of press buttons.
The second I made in the same size with a fabric that has a very large pattern (everybody shopping at the swedish furniture house knows it) and I used different parts of it on each side.
It is closed by zipper and inside it has one pocket and a fixed key-ring.
 
The next two are a little trickier as they are smaller, but having short handles to carry in the hand as well as an additional long string to carry over the shoulder (customers wish!)
I have noticed that with the zipper the top of the bag is getting heavier and the bags starts to sag, even with fabrics that are normally stable enough for my simple bags. For those I piece the body, what means that the synthetic leather ends where the cotton fabric starts. As the mushroom fabric had been very thin I took the synthetic leather behind the cotton fabric up to the top. This gives so much stability that the little bag feels a bit like a suitcase. Sewing the finishing seam on the top brought my machine nearly to its limit.
For the next one I decided for a slightly lighter version and doubled the piece of cotton print with a thicker cotton fabric. This worked quite well, added the stability I wanted and had been easier to sew.
 
I think I will stay with method for future zip bags.
 
Conclusion: Even if with the 100th bag and not really motivated to sew them, you can find out new ways and this will improve your future work.

A bientôt,
Jane 

Thursday 14 May 2015

3 dresses, but no girl!

Forget about all my bag sewing: I am now obsessed sewing little girls dresses. The moms of my sewing class want to make dresses for their daughters. I have no daughter, so no experiences in sewing easy summer dresses. I studied on P-i-n-t-e-r-e-s-t all weekend and filled up my pin-boards with cute models. On Monday I've been ready to attack the first, followed quickly by the second and third ...

1.) The easiest dress ever! I up-cycled an old men's-shirt that is violet (the only color I don't like, so I never used it). I used this pattern click and the dress had been ready in no time. I think it took me longer to print out the pattern and iron the shirt, than to cut and sew the dress.
I kept the buttons on the front (or is it the back?) and I also recycled the hem, so this saved some time either. 
I had no girl to try out the dresses (and my boys refused to wear them :-)), so all the dresses are not tested jet, but I can't imagine that they are not fitting one girl or an other! For now I had to photograph them on hangers. I will invite some girl friends of my youngest and make a photo shooting with them soon. 
This one can be a dress or a tunic depending on the size of the kid. Any way you can use it at least two years. This size is meant to be for a 4 or 5 year old.

2.) This dress calls "Lillith" and I found the pattern here
Also very easy to sew and available in sizes 92 to 116. I made it in 116. The skirt part is a very light cotton fabric. The top is more stable as it is doubled.
The top is closed with a simple button on the back.

3.) This model can be made as a top or a dress and I decided for a top. It's called "flutter sleeve dress" and the pattern is available in US size 4T (what is about 98-104 in European size), but there is a good explanation how to ajust the pattern for an other size. I found the pattern here.
I think those little sleeves are adorable and I can't wait to see the top on a little girl. I added a zigzag-ribbon on sleeve and hem for decoration. The original has been made with a small pompom trim, what I liked a lot too, but didn't have in my stock.

Those are for now the 3 patterns I tested and I think they are all usable also for beginners too. This dresses won't be the last, I have some more that I want to try out. 
A big Thank-you to all those that are sharing their patterns in the web-world! This is making sewing so very easy and convenient. 

A bientôt,
Jane 


As I used not only one, but three pins from P-i-n-t-e-r-e-s-t I think I will link this post to German link party at "Lillesol-und-Pelle" that's encouraging to actually use the pins you are stocking for years. You can find the Mai collection here

Actually I even made a forth dress or better a baby tunic that will be for my little baby niece, but I need to make some pants to finish this outfit before I can show it. 

Saturday 9 May 2015

Raspberry fence

I have not much to show lately, as in the moment everybody is ordering bags and it's a little boring to make blog-posts only about bags that are all more or less the same type. (It's getting boring sewing them too)
Also I am doing a lot of gardening. We had some good rain that makes everything growing very fast, especially the herbs. 
Are you remembering my raspberry plantation? During the summer the raspberries are growing over my head and often bending down. I tried to keep them upright with a wire fence, but it hasn't been stable at all and not high enough. A month ago I found some wonderful branches on a cow meadow. They had been cut since at least two years and lost their bark, but did not rot. They were smooth like floating wood and had the most beautiful light brown color. I asked and could take them with me for a rustic and stable fence:
It's a little hard to see the raspberry plants in front of the other hedge, but they are in average about 40cm higher than the pickets. Between the two levels of shrubs I try to keep a little path free to walk between the rows for picking the berries.
You can't see the poles? They are only 1,5cm thick iron rods that I hammered about 1m deep in the ground. Then I drilled holes in the branches and stuck them up on the rods. See some more details:
I am very happy with the look! (I would even like to have some more branches if I could find). Maybe I should cover the tops of the rods so nobody could get hurt. The snail shell is decorative but will probably not hold ...

A bientôt,
Jane 

Friday 1 May 2015

recycling booklet

After one week of absence and a lot of illnesses in the family I did at least a little crafting by recycling a used booklet. Every end of school year there are some booklets in the bag of my eldest that are not even used on half of the pages and the content is not worth keeping (like homework notebooks). By tidying up I found one and after ripping of the used pages I kept 8 double pages and about 10 half pages. I made new covers for them gluing fabric on card-stock with vliesofix.
The double pages are again fixed with two staple needles and I sewed the other.
Like this the pages are much nicer to reuse or a small present to have in stock.

A bientôt,
Jane