Tuesday 31 March 2015

A bunch of pouches

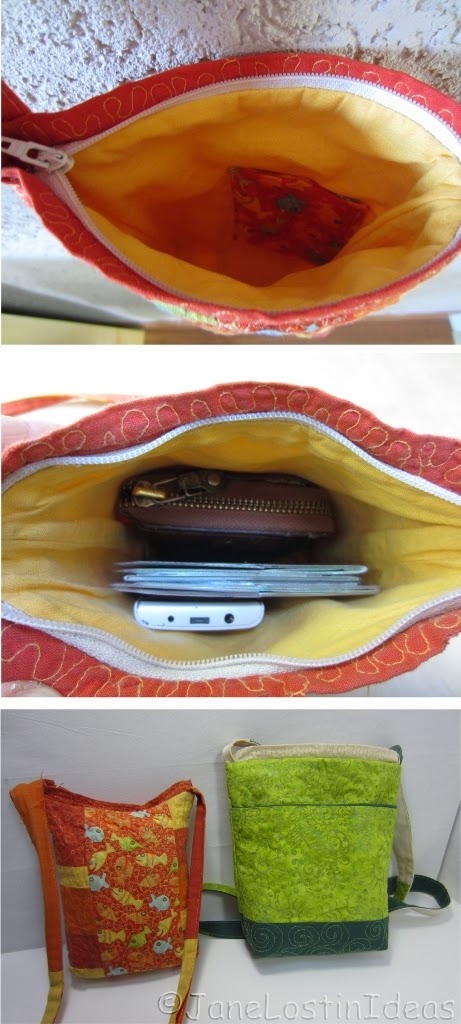
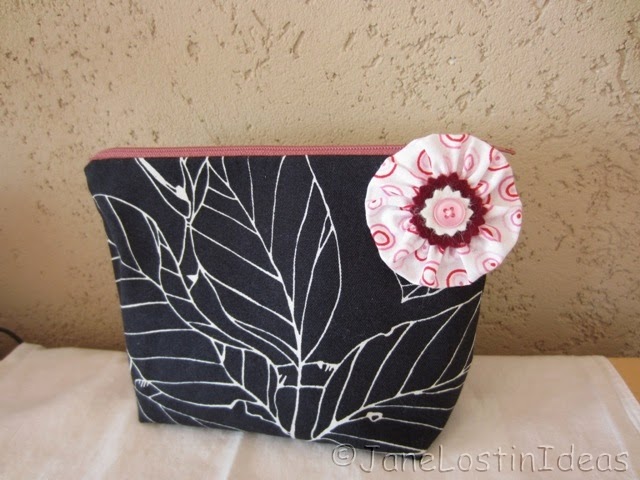
The members of my sewing group asked to learn how to make little zipper pouches. I said: "of course - no problem!", but later I remembered that I never made a zipper pouch with lining that has been 100% satisfactory and that is because of the lining always building a plead on the two ends of the pouch. Can you see it on the photo below?
This is one of the reasons I am mostly doing leather pouches like this ones (click). The request of my group has been a good reason to develop new skills. 
I started by just making the lining smaller. Simple theory, if there is less fabric in the corner, there can't be a big plead. And, voila, already the first try has been much better than anything before. 
No plead, but still I am not satisfied with the end of the zipper, as it is kind of random how he is disappearing on the ends. I have seen lots of pouches that are having a little crossbar on the end that is covering the end of the zipper. First try with that had been nice on one side but too small the other side. (it's the leg of an old jeans that I recycled here)
The next try (this time recycling the rear of an old jeans) has been much better. 
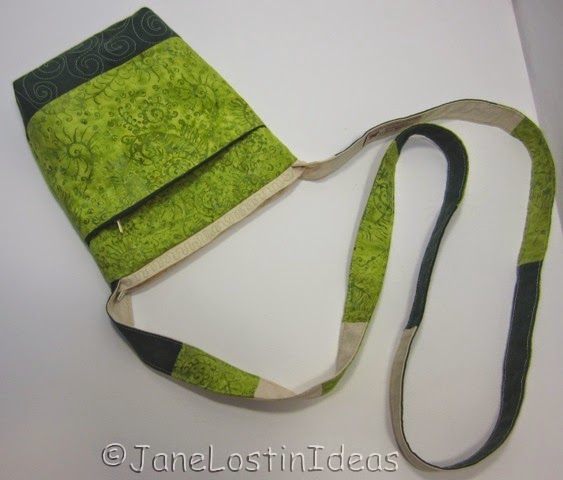
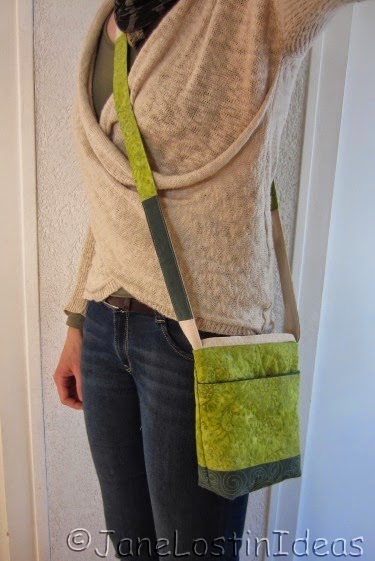
All those had a lining that is okay for me. Most of the pouches I make with a bottom so they can stay upright. I for myself have not much use of flat pouches. I did one anyway...
I am still trying to bring the zipper ends to perfection. I have to try out some more varying the point until where the seams have to go along the zipper and as well in the vertical. (specialty of the elephant pouch: It has also a padding to add stability to the very sloppy fabric)
Maybe I should buy an instruction how to do the perfect pouch, there a about a 1000 (or so) available. But then I can't use this for giving courses and need a permission for selling them, so I guess I will figure out a method all by myself that is satisfying my standard. Also like all the tutorials I showed you so far, I can vary the size of the bag/case/pouch depending on the fabric I have. If I still have a piece of 25cm but a pattern is only demanding 20cm, I don't like to cut of 5cm that are more or less wasted.

After making five pouches last weekend, I needed a break and made one that has the zipper ends outside. Like this it is not completely closed, as there stays a little opening under the ends of the zipper, but I like it a lot! Looks much more tidy and you can open it wider that all the others to put stuff in.
By the side: the members of my class liked this case best too, but I forced them to make the other one first. We will probably have some more sessions for inserting zippers in all kinds of bags.
And I will continue trying out different techniques and probably everyone in my surrounding will get a pouch as a present in near future - be warned! :-)

A bientôt,
Jane

Thursday 26 March 2015

Colorful name

For the birthday of a friend I draw her name on a big card and colored it. It is a bit like the style I tried out in February. I love using the hole range of colors, but still each color stays for it's own.

A bientôt,
Jane

Tuesday 24 March 2015

Hen meeting

Yesterday evening we had a hen meeting with my sewing circle. With a lot of gaggle we made some fabric chicken.
I like them sitting around in pairs and chatting. 

They will now spread out and sit on bookshelfs and cupboards all around our living/dining room...
The red one is more a loner. But look how cool he crossed his legs ...
There are probably a 100 instructions for chicken in the web. I think my method is a mix from several that I have seen. I developed this pattern for me two years ago and I can't remember where I got the inspirations from.

A bientôt,
Jane
(voyez les poules, on rappel que Pâques s'approche!)

Saturday 21 March 2015

Memories of my old handbag

This post is in honor of my old handbag. 
I made it in the summer of 2012 and used it since. For the reasons I mentioned in the last post I made it very small, but also because we have been camping a lot in that summer and it is not practical to have a big handbag with you in a tent. Still you need to have money and papers with you. This little bag I could wear or I put it with the rest of our belongings for outdoor tours in a backpack.
You can see it is even smaller than my new one, but I never needed more space. 
I liked the orange a lot and still do. Just looking at those colors is lightening up the day. Only sometimes I had difficulties combining it with my cloth, when those contained pink or rose or violet (not very frequent and only in summer, so not bothering me much).
I also love the happy fishes. I repeated the fish motif in the quilting. Around the fishes I only quilted bubbles. 
What I like best of handbags like this: You can put them in the washing machine when they are dirty. No special treatment necessary and they look as good as new afterwards.
But two and a half years of use payed its toll. Some of the edges are rubbed through now, so it is time for the retirement of a dutiful and well used bag.
This is the most useful bag I ever made and I can only hope my new one will just last as long. 

A bientôt,
Jane

Thursday 19 March 2015

My new handbag

I just finished my new handbag and I am so excited about! Have a look:
It is allover quilted to give the stability to the otherwise thin (normal patchwork fabric weight) fabrics. The strap is quite long (1,40m) as I like to wear my handbags diagonally:
The bag closes by a zipper on top and there is a zipper pocket over the whole front. Inside there is one open pocket.
I used up one of my treasured fabrics, that has been in my drawers for at least 6 years. I think this is a good use for a favorite, as now it will be around me every day for quite a while. I am not one that is changing handbags often. My last one I used for 2 1/2 years now. I will show you farewell pictures of it in the next post.
The allover quilting is very discreet as I wanted the spirals in the light green fabric to be the attraction of the bag.
The size of the bag is 14x19x6 cm, so it is quite small. If I have a big bag I tend to fill it up and then it is too heavy on my shoulder and I get tension in my neck and then headache. To avoid all this I started having only the absolute necessary in my small handbag, like papers (of me, my kids and the car), mobile phone, purse and keys. This bag is a little bigger than my old one. Let's see how we will get along together ...

A bientôt,
Jane, qui est très content avec sa nouvelle sac a main!

I linked this post to a german link-party called: RUMS (around the woman on Thursdays), where you can link every Thursday something that you made only for yourself!

Monday 16 March 2015

Emergency help for a princess

Little Arielle had a problem with the shoulder straps of her bra - of course I couldn't let her go without being dressed properly ...
This is the smallest piece of clothes I ever had under my machine. There is not much more than 3 square centimeters of fabric in that bra.

A bientôt,
Jane

Thursday 12 March 2015

Pizza Pizza!

Look what we had for lunch!
Hmmmm ... Pizza!
Homemade Salami Pizza! 
Ingredients: Felt
Pastry with a fluffy crust, tomato-sauce, salami and cheese - ready!
The kids now can bake me a Pizza, whenever I am hungry ...
A friend of mine bought a pizza like that for her son and I knew immediately that this is a missing part in our play kitchen, so I copied it. 

A bientôt,
Jane

Tuesday 10 March 2015

The second attempt is acceptable

I needed a bag for transporting the equipment for my hobby - horse riding. It had to be insensitive to dust and dirt (=> grey color and synthetic leather), insensitive to humidity from outside or inside (=> oil cloth inside) and I wanted to have some inside pockets for a bit of order in my stuff.  
At first I over-sized the bag a little. It had been all sloppy and unhandy, so I ripped it up and cut the pieces smaller. Now it is maybe a little bit too small, but still acceptable, even when the helmet is not fitting in completely. Anyway there are only the most basic things inside that I like to have around. 
When getting the helmet out, you see the bottom is filled with the other stuff and you can see the side pockets I made from oil cloth, but I haven't the impression, that they are helping much for the tidiness. 
I am not entirely happy with it, but I will try out this evening if the bag is at least fulfilling the needs of transporting my stuff in one hand and not forgetting something ...

A bientôt,
Jane

Thursday 5 March 2015

Flowers and yoyos

Already two years ago I founded a sewing/crafting group, where we met about every two weeks to do little sewing projects together. My initial idea was that we would take turns to prepare the projects and leading the others, but in the end it has been always me. The others have been mostly working moms with few times for sewing and they appreciated the possibility to do a project that could be finished on one evening without looking for instructions and wasting time on preparing. 
After about 9 month the group like went to sleep. But now there have been quite a few requests to renew it and yesterday we had the first meeting with also some new members. We discussed a bit the projects to realize in the future, so I can now prepare for it. They kind of insisted in paying for my tutorial work and therfor I am a bit stressed to find the right way to teach  so everybody is satisfied.

We started with a little deco project. I prepared some examples of fabric flowers and Yoyos ...
The Yoyo on the little zipper bag is matching the lining. I also fixed one with hot-glue to a cloth-pin. I like to use that for example to pin a note on a present.
Some very little Yoyos I fixed to a birch crown together with some leaves I made out of fabric scraps that I glued together with Flisofix and a piece of wire inside. 

I also made small flowers that I fixed with hot glue to sticks. Those three I planted in a piece of floating wood so they can stay upright on the table.
They are also doing very nice in one of my deco houses:
I made some experiences with instructions for Japanese fabric flowers (Kanzashi), but I didn't managed to get as pretty results as shown in the examples. Somehow mine have been either bulky or when I used lighter fabric they were floppy. 
So I got back to a technique I already used years ago. Make yourself some triangles by cutting a 9x9cm square diagonally. Then fold them and close the shorter side to get a new rectangular triangle. Turn them to the right side, iron them and pull a thread trough like you can see in the picture below (red example). Finally pull the thread on both sides and fix the five petals to a round. Glue the stick in the middle and also two felt circles or buttons to hide the middle.
On the picture above you can see also an other example: The white one is giving round petals. You cut squares about 7,5x7,5cm, fold them in half, iron them and then you cut the rectangular corner off in a half circle. The rest stays the same. You pull a thread through the open side and plead the petals.... (click on the photo to see the stitching better).

It has been a fun evening yesterday, trying out all those things with the girls and chatting a lot. This will be repeated!

A bientôt,
Jane

Tuesday 3 March 2015

A little repair

Today I changed temporarily my profession to mechanic and took apart my sewing machine. 
Only parts of it, but important parts. Two weeks ago I managed to break a spring in the mechanism of the upper thread tension. It still worked, but I feared it may cause major problems in a moment I am really in need of a working machine. 
As you can see my machine is old. The advantage is, that there is few electricity in it and I can do most of the maintenance myself. The disadvantage is, that you can't find replacement pieces in every sewing machine store.
This are all the pieces of the thread tension with the new spring (right side). 
I think I got them back together in the right order. It is working anyway! 
The tension for sewing is good, but I think there is still a bug, as the tension is still quite strong, when I lift up the foot and pull out the fabric under it. Did anyone know what I might have done wrong? 
May I show you a picture of my beloved Pfaff 230? It is not an automatic one, that means I can only sew straight and zigzag, but hey if I want to have a fancy seam, I can quilt it, can't I. The only (and very small) thing I am missing sometimes is an elastic stitch for sewing T-shirt cuffs. Otherwise it is just great what this machine can sew. It is not even hesitating to go through 4 layers of leather!
My biggest fear is that one day it might be broken and can't be repaired.
Before I got it, the machine had been used in a polish textile factory. It is a table machine and is not a standalone. My husband made me the wooden base already in the beginning of our relationship. Later, when I started quilting he made the extension from Plexiglas. 


Unusual tidy my desk - it won't stay long that way ... 

A bientôt,
Jane

edit: I found out what has been the problem. One disc had been installed in the wrong sense. Now everything is working fine!