Tuesday 28 February 2017

Paper weaving

For a future project, about which I don't talk about now, I experimented a little with paper weaving. I did this with my kids when they had been smaller with rectangular cards and parallel stripes. This time I wanted to try on irregularly cut lines.
The first ones didn't turn out as I expected. In fact you can't really see that the paper stripes and the slits are not even.
I found out that you really have to slice big waves in the base paper to see the effect.
I also tried with two colors for the weaving stripes. 
The next two are the only ones I really liked and I glued them on cardstock to use them as post cards. On the left card I also hid the ends of the weaving stripes, what I didn't do for all the others.
And one I tried how it looks like if you cut the slits in the other direction, so that the weaving stripes are longer than the slits.

A bientôt,
Jane

Tuesday 21 February 2017

Casting one candles - or a neverending story

Outside the sun is shining a lot now, it is getting warmer and the flowers are starting to grow again, the birds singing, you can go out in a light jacket ... short: the spring is coming! So normally not really the time of the year where you think lots about candles. But I already started this in January and want to show you the end of a looong lasting small project!
I simply wanted to recycle the leftover wax from the candles I burned during Christmas time. I also had lots of wax left from the last year too. I like to burn fat candles and there is always one or two cm of candle left, when the wick won't burn any more.
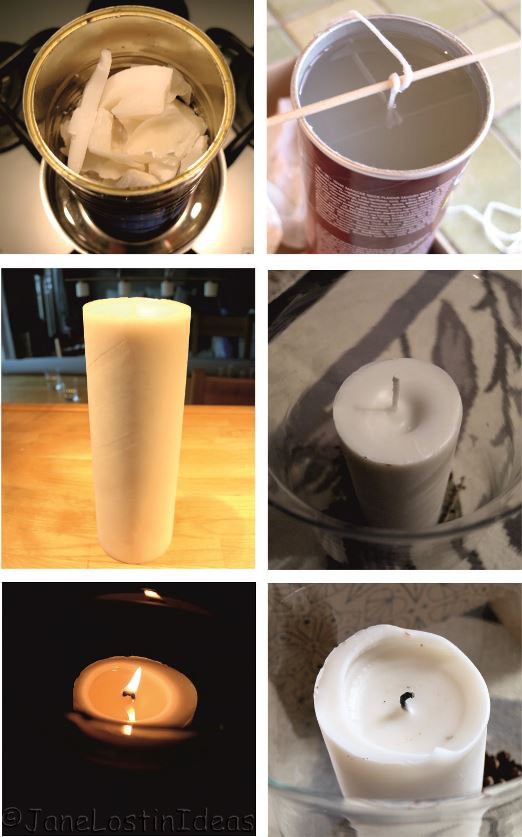
I smashed all the white wax (or better the stearin) to pieces, pulled out the wicks and put it in a big sausage can in a water bath on the stove to melt.
I prepared a cardstock chips can as a mold for the new candle. I made a hole in the bottom and pulled a waxed new wick through and fixed it on top on a stick, so it stayed in the middle. When all the wax was liquid, I filled it into my mold and let it cool down.
So far - so easy! Then I pulled accidently out the wick and had to redo all the steps again :-(
This time I let it cool down really well and get the candle out by breaking the mold. 
Did you see the hole in the middle of the candle on the last picture above? I don't know why it does that, but I didn't mind and tried to light up the candle.
It didn't burn well. In fact the flame drowned always in the wax dripping down from the sides. 
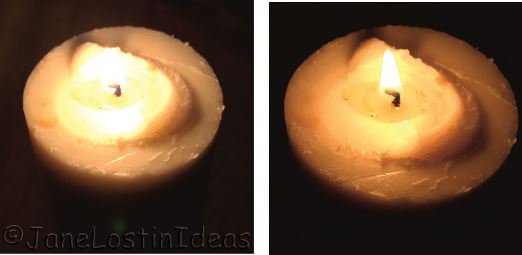
I took it to my husbands workshop and with a hot wire I cut of the top ring, until the top of the candle was more or less in one plane. Now it burned with a stable flame quite nicely! 
But not for long!
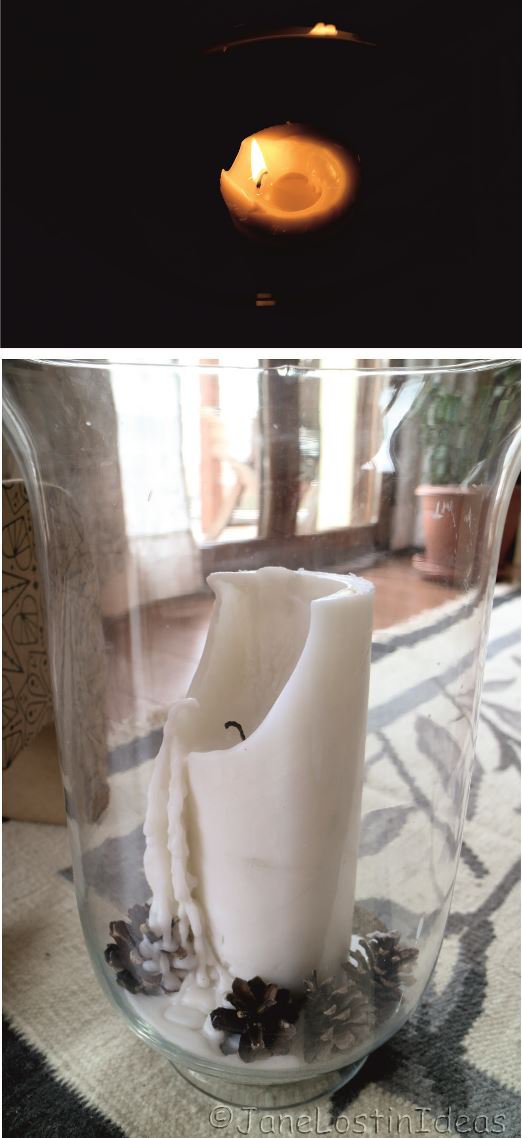
As you can see on the top photo, the wick leaned to the side and burned a hole in the wall, letting the wax flow out. 
Aaaaahhhhhrrrgggghhhh :-(  
I had some more wax pieces left and with the remnant of the odd candle I did for the third time all the steps you can see on the first two photo blocks - After eating frustrated another can of chips to get a new mold :-) 
This time I tied the wick under the mold with a double knot and during cooling down I hold the wick under steady tension, to avoid it making curbs again. Also I kept some wax and when the middle of the candle formed again its bizarre crater, I filled it up. Two times!

I can't really believe it, but now it works! 
The candle burned already three evenings without a new disaster!
Let's hope it stays this way! If not, you will hear me using ugly words :-)

A bientôt,
Jane

Thursday 9 February 2017

An ordered bag

I had an order for a bag from a lady who already bought a yoga-mat bag (of which unfortunately I didn't took a picture) and now she wanted a bag for all her other stuff, but matching the mat bag. Also wanted: zipper pockets and shoulder straps as well as short handles.
I did my best and again I am surprised that sometimes bags that I would never have made like this by myself are turning out very likable anyway:

 The backside was a little boring, so I felt free to add those words!


Inside there is also a zipper pocket and an elastic strap to hold a water bottle.

As recently I am getting more and more orders for yoga bags, I added a yoga-shop page to this blog (look above on the header line). 

A bientôt,
Jane

Wednesday 1 February 2017

Recycling leather - basket

When tidying up some boxes with old stuff, I fell over my old school bag that later I used also in university. 
It looks old and well used, doesn't it? And I surely won't use it again. Our house has not enough storage space to keep things like this out of sentimentality. But it is hard to through away something you had for a very long time. (And actually I have no idea where to give leather for recycling).
So I recycled it myself. The back, the flap and the leather under the front pockets are thick and stable. I re-used those parts to make a basket! 
This is the old backside. For the handles I reused the old shoulder strap. On the backside I left a rivet from the old belt, so it's more interesting looking at, as that side of the basket is quite dreary.
Here you see the old front side. There are some holes in the leather, where the front pockets had been. I stitched a decorative zig-zag-ladder on them.
The form is a little funny, but round wouldn't work with the material I had.
On the bottom you can see the spots where there had been the sticker and the clasps.
I did all seams by hand after punching holes with a belt punch.

It had been fun making and I like the result very much. The old leather has a special charm! 
For now the basket has a place on our couch table containing all the little things always lying around. We'll see what I use it for in the future.
I am very happy to not throw away still usable material. Now my old bag has a new life!

A bientôt,
Jane